
Your first live domain
This guide takes you from an empty dashboard to a working, secured domain. You need an app that's reachable on the internet: a server's public IP address and port, or a domain that already serves it.
Step 1: Create a project
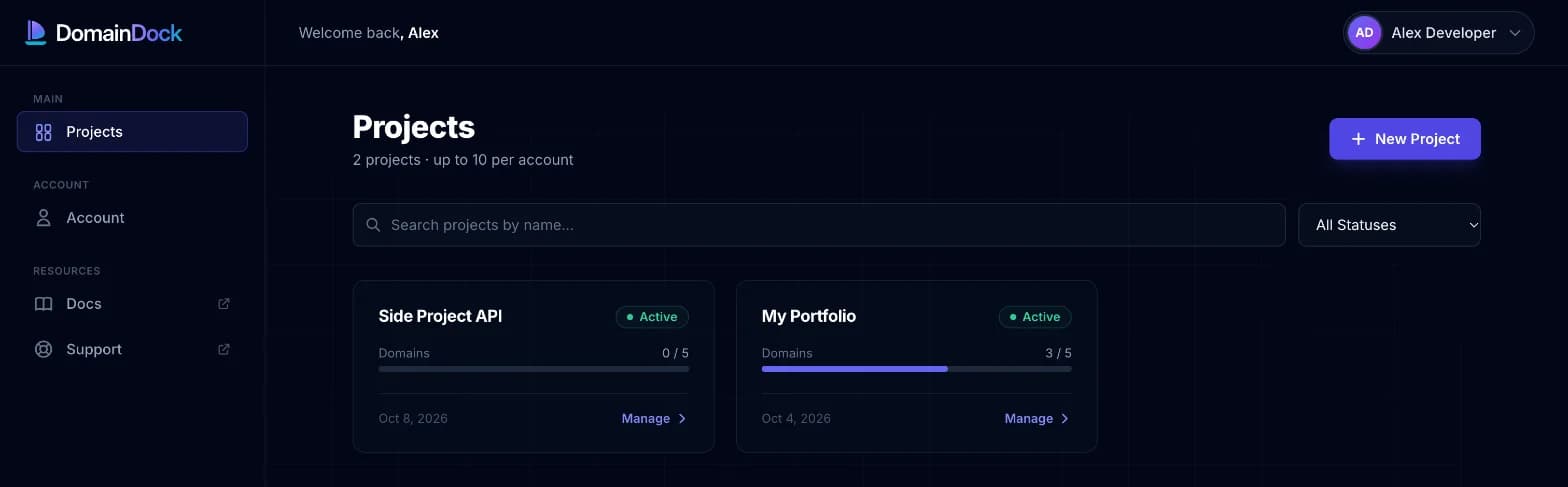
- Open your dashboard and click New Project.
- Give it a name, for example
My Portfolioand click Create Project. - Open the project from your projects list.
Step 2: Add a domain
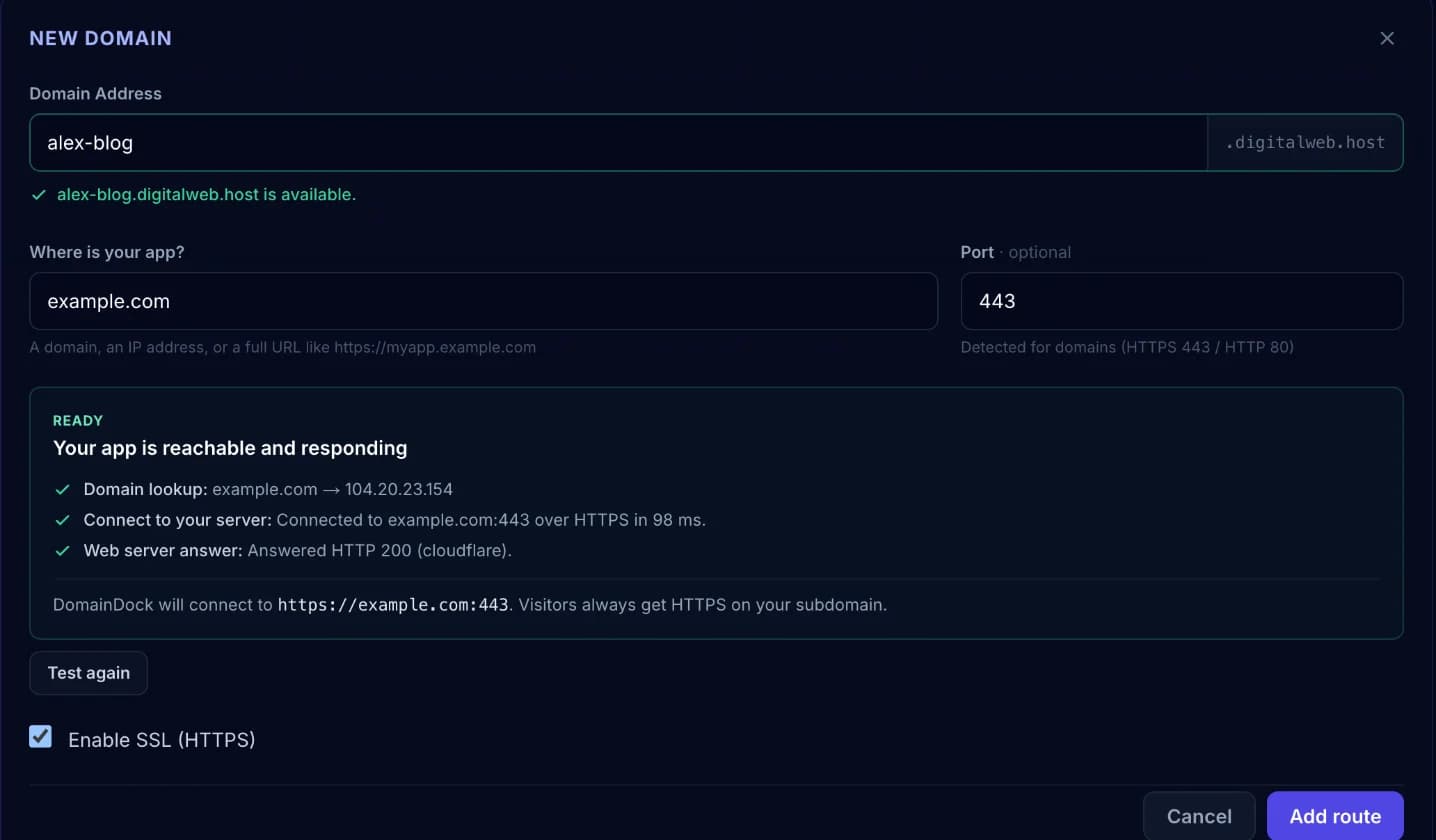
On the project's Domains tab, click Add Domain and fill in:
- Domain Address: the name you want, e.g.
shop, which becomesshop.digitalweb.host. Availability is checked as you type. - Where is your app?: a domain (
myapp.example.com), a full URL, or a public IP address (203.0.113.10). - Port: only needed for IP addresses, e.g.
3000. For domains it's detected for you.
As soon as you leave the field, DomainDock tests the connection to your app and shows the result. Green means you're ready: click Add route.
Step 3: Wait for it to go live
Your new domain shows PENDING, then PROVISIONING, then ACTIVE, usually within a minute. Open https://shop.digitalweb.host and you'll see your app. Use the copy button beside the domain to grab the full address.